
Beyond the Surface: How to Spot (and Fix) Hidden Stucco Damage Before Winter Hits
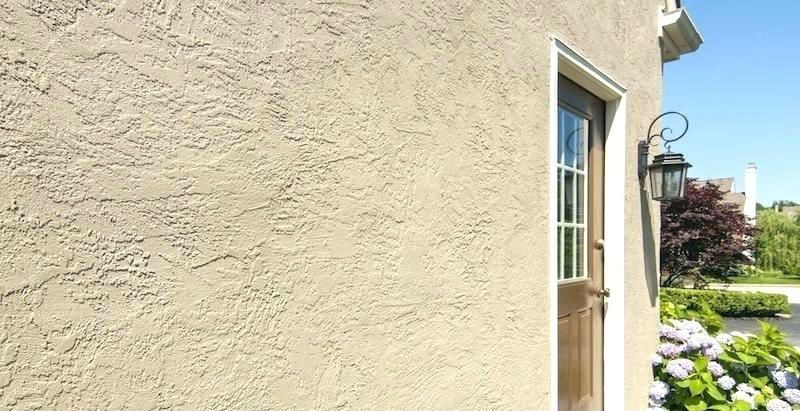
Most of the stucco failures we open up did not start in just the last winter. They started years earlier as a hairline crack near a window corner or a faint rust-colored streak nobody thought twice about, and the wall slowly rotted behind the finish. Knowing what those early signals look like is the difference between a modest stucco repair and a full tear-off with framing replacement.
This guide walks through the warning signs we see most often, why stucco systems fail in a freeze-thaw climate, and how to tell an honest remediation from a cosmetic patch that traps water inside your walls.
The Warning Signs Homeowners Miss
Stucco is a cladding, not a waterproof shell. It is designed to shed most water while the building paper, flashing, and weep details behind it manage whatever gets through, so an inspection of the visible surface can often tell you what is happening out of sight.
These are the symptoms we ask homeowners to photograph before we ever set a ladder:
- Hairline fractures radiating diagonally from the upper and lower corners of windows and doors. Corners concentrate stress, and cracks wider than a credit card edge (roughly 1/16 inch) are open invitations for wind-driven rain.
- Rust or dark streaks below window sills, band boards, and roof-to-wall junctions. That staining is often corroded lath, fasteners, or wet sheathing bleeding through the finish coat.
- Efflorescence, the chalky white powder that appears after a wet stretch. It means water moved through the wall assembly, dissolved, salts and carried them to the surface as it dried.
- Flaking, bubbling, or peeling paint, especially in wide patches. Elastomeric and latex coatings fail when vapor pressure pushes from behind, which tells us moisture is trying to escape and cannot.
- Soft, hollow, or drummy spots when you tap the wall with a knuckle. A dull thud instead of a solid tap suggests delamination from the lath or substrate.
- Interior clues such as musty odors in closets on exterior walls, swelling drywall corners, or windows that suddenly stick.
One or two hairline cracks on a large elevation are normal. A cluster of them at every window, paired with staining and efflorescence, is a pattern, and patterns are what we take seriously.
Why Stucco Fails Here: Water, Then Ice
A great deal of the damage we remediate traces back to homes built roughly between 1990 and 2010, when stucco was applied over wood sheathing at high volume and detailing standards did not always keep pace. The common oversights are consistent: missing or reverse-lapped kickout flashing at roof-wall intersections, single-layer building paper with no drainage gap, sealant used as the only defense at windows, and stucco run tight to grade or to a deck ledger with no clearance.
Water finds those gaps during driving rain, soaks the paper and sheathing, and then has nowhere to drain. Winter turns a slow problem into a fast one. Trapped water freezes, expands roughly nine percent by volume, and pries the stucco away from the lath from the inside out. Each freeze-thaw cycle widens the crack, which admits more water for the next cycle, and the region sees dozens of those cycles between November and March.
Can I just paint over cracked stucco?
Paint alone fails on cracked stucco because it cannot bridge moving joints wider than about 1/32 inch and it reduces the wall's ability to dry. If the substrate is wet, a low-permeability coating will blister and peel, usually within one to two seasons.
How do I know whether my stucco damage is structural?
A moisture reading above roughly 20 percent in the wood sheathing indicates active decay risk, and that requires opening the wall to confirm. Visual signs alone cannot tell you, which is why probe testing and inspection ports are part of any honest assessment.
Quick Patch Versus True Remediation
We understand the appeal of a caulk gun and a gallon of exterior paint. The trouble is that both approaches treat stucco as a skin to be sealed rather than a system that needs to dry, and sealing a wet wall accelerates the rot you are trying to stop.
What a cosmetic patch actually does
- Silicone or acrylic caulk in cracks bridges the gap for a season or two, then splits again because the crack is still moving. The moisture already behind the wall stays put.
- Elastomeric coatings create a low-permeability film. Applied over saturated stucco, they hold vapor inside and often blister within a year.
- Skim coats of modern cement over failing base coats add weight and rigidity to a substrate that has lost its bond, so the new work debonds along with the old.
What proper stucco repair involves
Real remediation starts with diagnosis, not material. We probe with a moisture meter, open small inspection ports at suspect locations, and confirm whether the sheathing behind the finish is sound before quoting anything.
- Remove failed material back to solid substrate and replace any rotted sheathing or framing.
- Correct the details that caused the leak: kickout and step flashing, sill pans, properly lapped weather barrier, and clearance at grade and horizontal surfaces.
- Rebuild the wall in layers with new lath, a scratch coat, a brown coat and a finish coat, allowing appropriate cure time between them rather than rushing the schedule.
- Use breathable, lime-rich mixes where the home and the original assembly call for them, so the wall can release vapor instead of storing it.
On older homes with solid masonry walls and original lime stucco, we take a different path entirely. Hard portland-based patches on soft historic substrates crack the masonry rather than the patch, so we match the original material and let the wall keep breathing the way its builders intended.
Your Three-Check Seasonal Maintenance Routine
None of this requires special tools, and twenty minutes twice a year catches most problems while they are still inexpensive.
- Walk the foundation line. Stucco should stop about six to eight inches above soil and roughly two inches above hard surfaces like patios and driveways. Where mulch or new paving has buried that gap, water wicks straight into the wall.
- Inspect every window and door perimeter. Look at the top corners for diagonal cracking and at the sill for staining or bubbling. Press gently below the sill with your thumb; any give means the material behind has softened.
- Check the roof-to-wall junctions. Where a roof edge meets a vertical stucco wall, there should be a kickout flashing diverting water into the gutter. If you see a stain running down the wall below that point, the flashing is missing or misdirected, and this is the single most common source of concentrated damage we find.
Do these checks in early fall and again in spring. Fall matters most, because anything you catch before the first hard frost can usually be addressed before ice gets involved.
Schedule Your Exterior Moisture and Stucco Inspection
We are offering free stucco and moisture inspections through the first frost, and every visit includes probe readings, photos of the problem areas and a plain explanation of what we found. If you have noticed a crack, a stain or a musty closet, let us look at it while the weather still allows for a real fix.